Zelda: Tears Of The Kingdom - South Lomei Labyrinth And Shrines Guide
Search for the right path in Gerudo's South Lomei Labyrinth in The Legend of Zelda: Tears of the Kingdom.
The Legend of Zelda: Tears of the Kingdom South Lomei Labyrinth is a set of massive mazes in the Gerudo region. The idea is to find a shortcut that would make the process a lot easier before we can claim a cool reward. Here's our guide to help you complete the Gerudo South Lomei Labyrinth in Zelda: Tears of the Kingdom. Likewise, please be reminded that this article contains minor spoilers about the item reward.
Surface and Sky Labyrinth locations and how to get there
There are three Labyrinths in the game, and they all have counterparts in the Surface, Sky, and Depths regions. Given how they're quite far from most other landmarks, we suggest taking a look at our Shrine locations guide and Skyview Towers guide, as these let you know about the best places where you could start your journey.
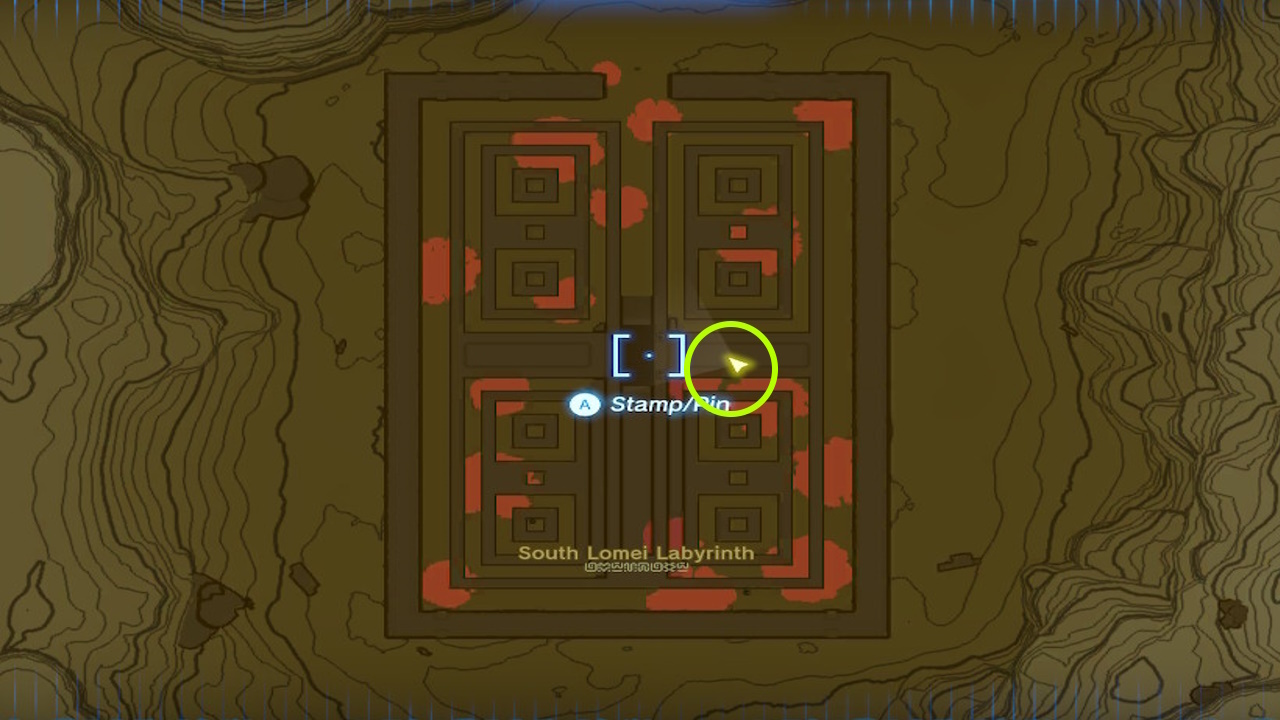
As for The Legend of Zelda: Tears of the Kingdom South Lomei Labyrinth, it can be found in the southeastern tip of the Gerudo region. Rather than trekking through the desert to reach it, we'll take a detour instead by tagging the Sky Labyrinth's Shrine first.
For this, you can use various vehicles and devices, though we suggest the Rakashog Shrine in the Gerudo Sky Archipelago as a jump-off point. You should have enough Zonai Devices to make a Rocket-powered Fanplane, one that you can steer close enough to the entrance. There, you'll be able to tag the Siyamotsus Shrine as a fast travel point.

South Lomei Labyrinth: Motsusis Shrine and central terminal
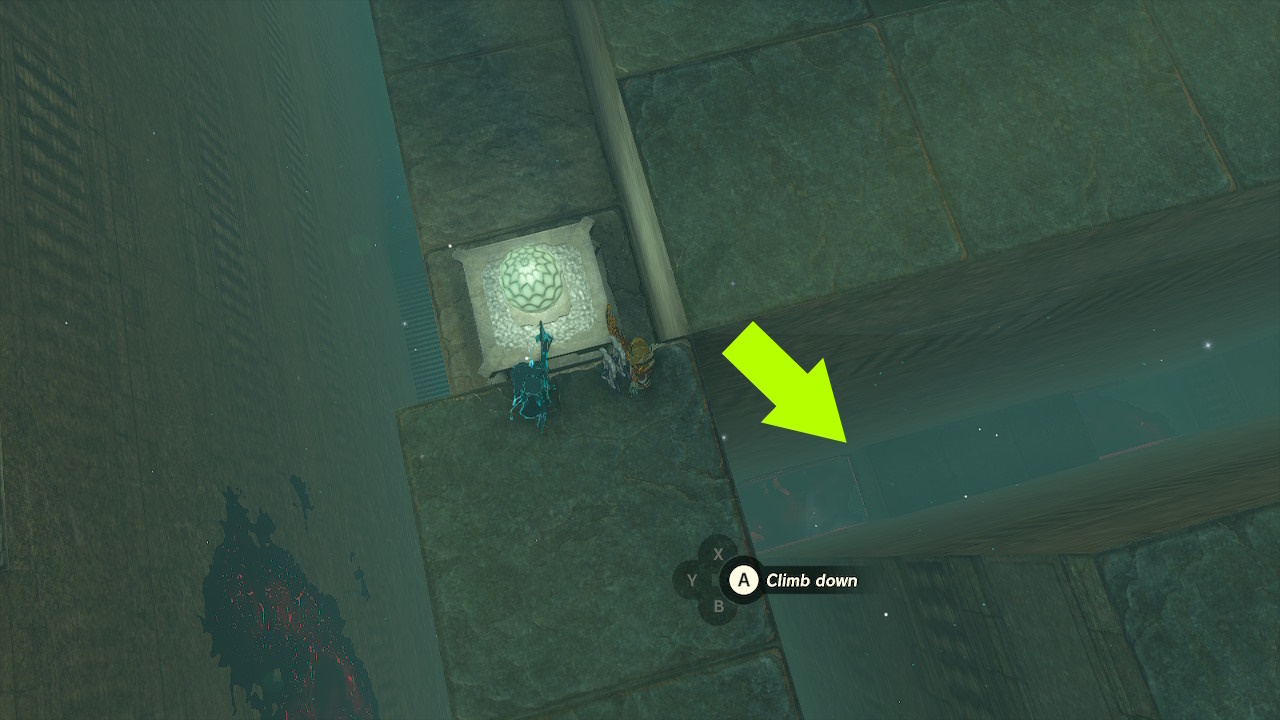
From the Sky Labyrinth, dive down to the Surface Labyrinth. Once you land on the topside walls, make a manual save. The idea now is to find the structure's central terminal. You should be able to see it in the narrow right-hand corridor from the center area.
Inside, interact with the terminal to get the South Lomei Prophecy quest, which you should track. You may also enter the Motsusis Shrine, which has a Rauru's Blessing and a Large Zonai Charge. With this part done, it's time to return to the Sky Labyrinth.
South Lomei Sky Labyrinth: Siyamotsus Shrine Puzzle
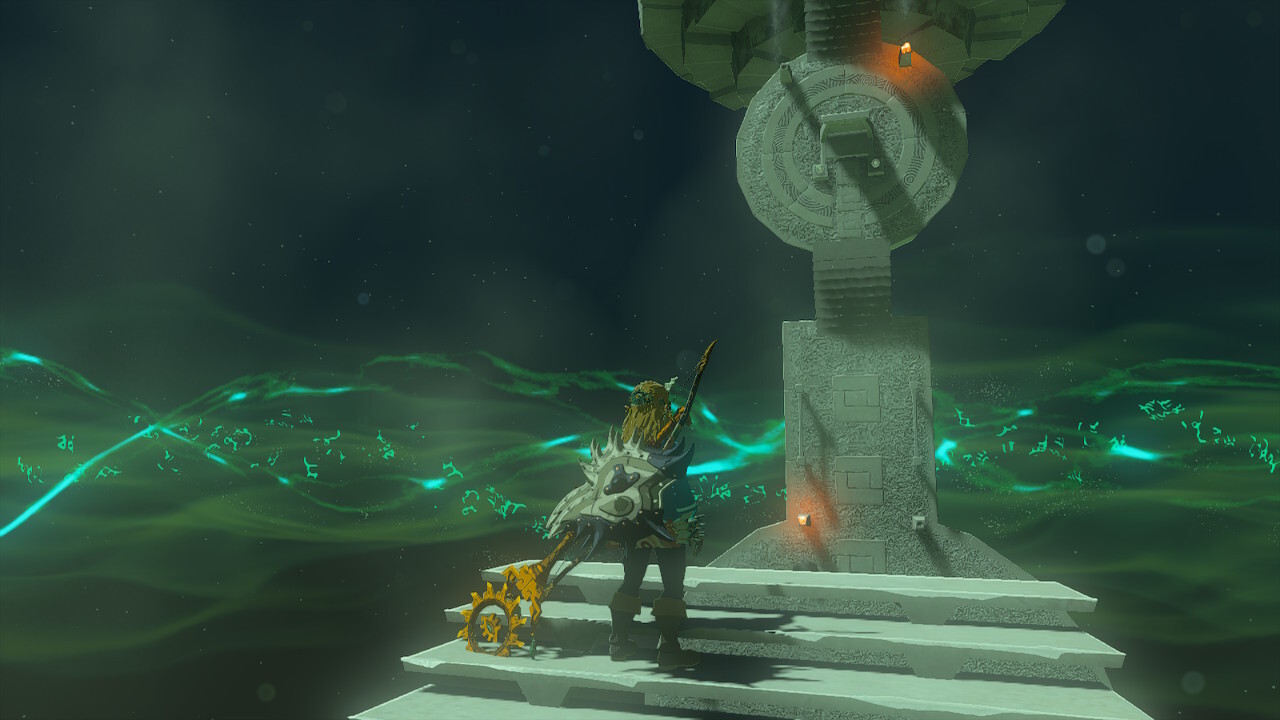
For this part, we'll discuss the Sky Labyrinth's Shrine. The Zelda: Tears of the Kingdom Siyamotsus Shrine might surprise you at first. That's because it's designed like a Rauru's Blessing area. However, you'll notice some odd things, like Fire Fruits and arrows scattered all over the place. Then, once you approach the altar, it will move and rise.
Now, you'll have to put the items you just looted to good use. Examine the section in front of you and look for the four braziers. Two are already lit, so you just need to set fire to the others. Use arrows with Fire Fruit attached for this task. When you're done, you'll receive a Light of Blessing.
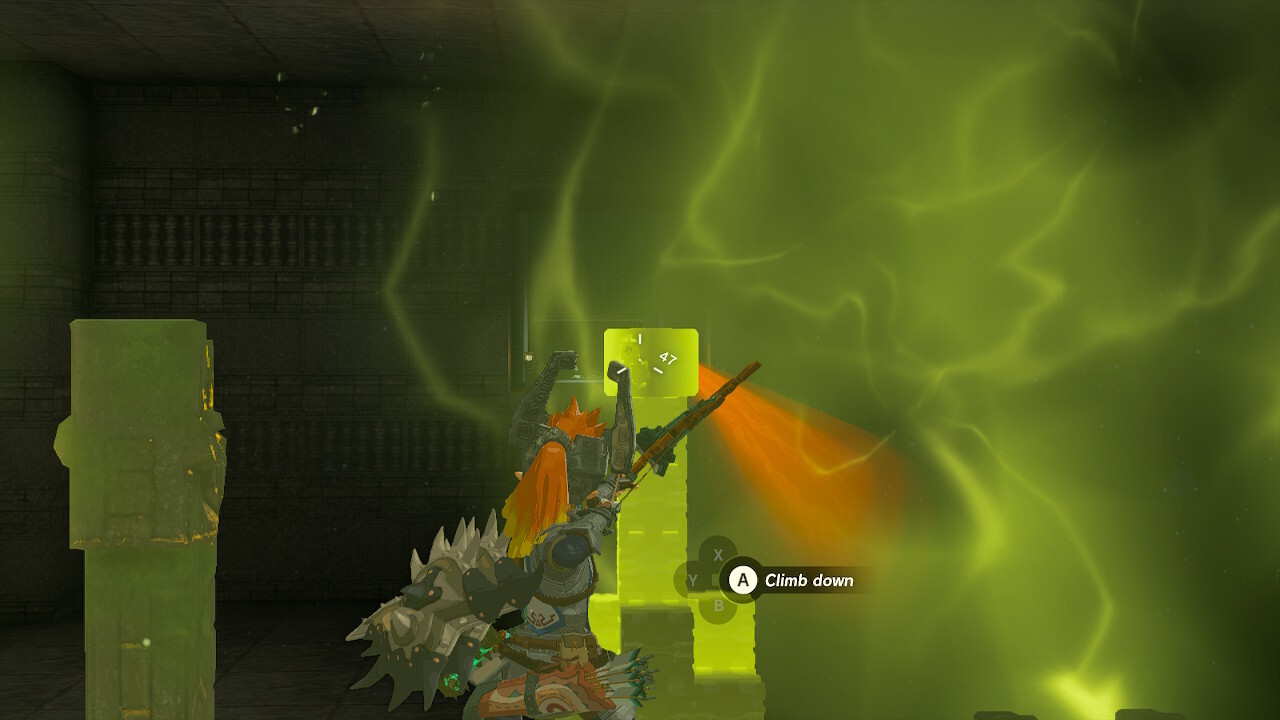
South Lomei Sky Labyrinth terminals
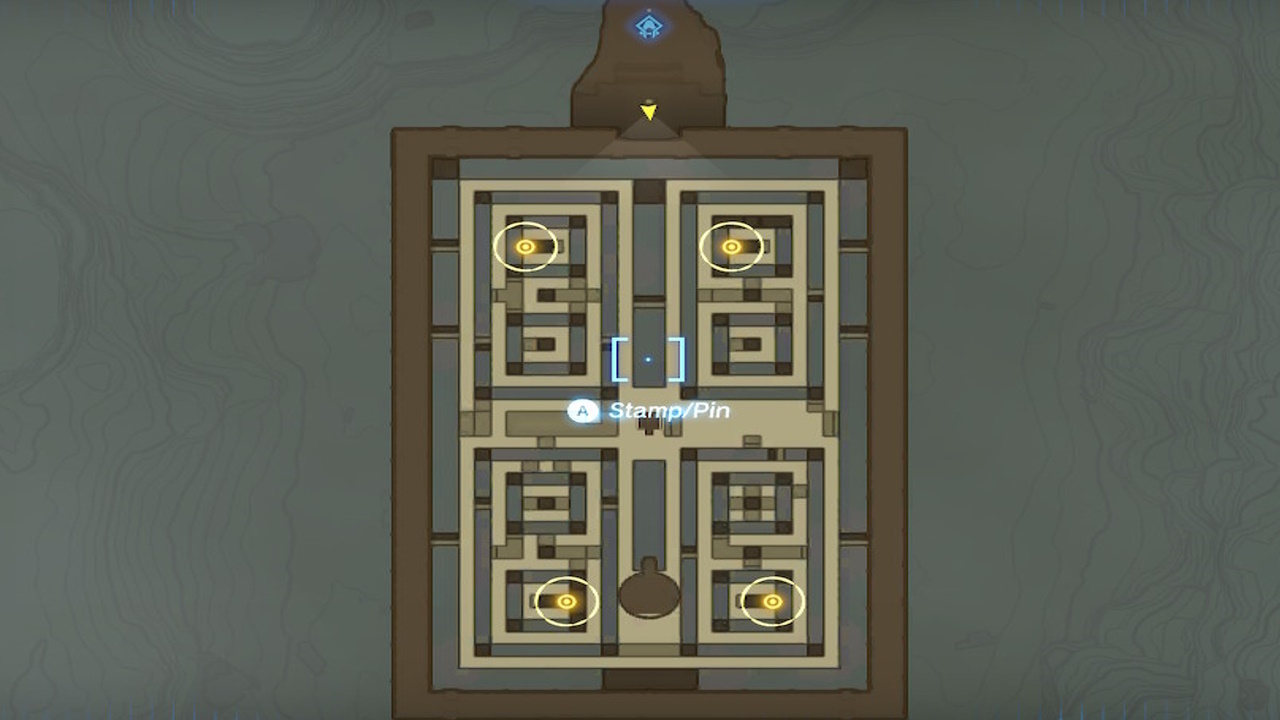
As for the Zelda: Tears of the Kingdom South Lomei Sky Labyrinth, our objective is to activate four terminals in the maze. You can see them in the image below:
Given that there are several updrafts in this low gravity area, you'll be able to reach the top easily enough. Likewise, you can climb using the ancient walls near the entrance (i.e. unlike the bronze inner walls, these have a reddish and ornate design). You may also stand on the flatter portions that are jutting out to regain stamina.
In any case, the terminals are in the four smaller rectangles within the larger rectangular sections (not to mention how the whole structure is shaped like a rectangle anyway). Traverse the topside wall, then dive down to activate each one. You'll probably want to fast travel back to Siyamotsus Shrine so you can climb the walls again, though.
South Lomei Depths Labyrinth boss and rewards
Once you've interacted with all four terminals, the main terminal will appear at the top. Ride the strong wind current and activate it. This will open a path to the South Lomei Depths Labyrinth. There, you'll fight a Flux Construct III boss. It's still the same ol' green Minecraft-esque robot that you've been battling in some areas. Still, here are some abilities to take note of:
- When it's in robot form, use Ultrahand to grab the energy block (the one that's charged).
- When it's in block form, just avoid it as it rolls, and keep trying to grab the energy block.
- When it's in the air, shoot it with something that deals AoE damage, like a Bomb Flower attached to an arrow. Then, keep pulling blocks until you see the energy block.
- Attack the energy block once it's been separated from the rest.
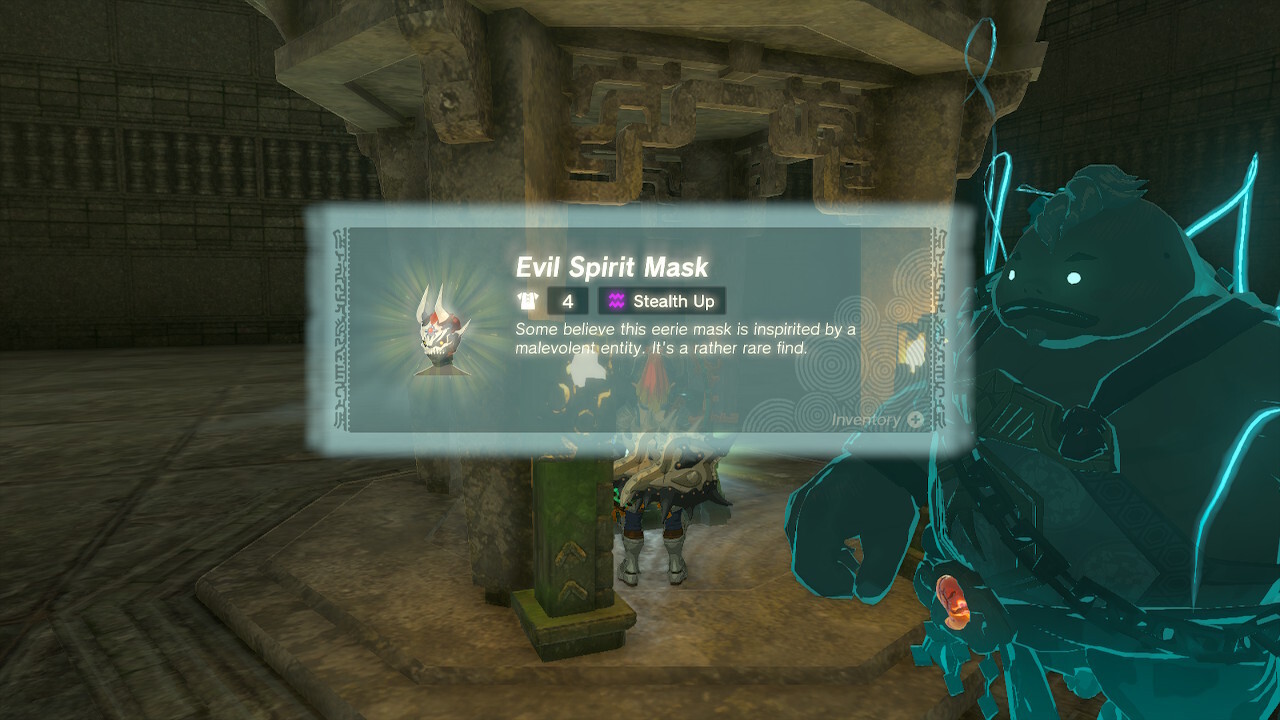
After defeating your opponent, activate the terminal to spawn a chest. Open it to receive the Evil Spirit Mask. It has +4 armor rating and it increases your stealth. Likewise, wearing the full set yields increased proficiency when using bone weapons. Also, it has the same look as the Phantom Ganon set from Breath of the Wild.
In any case, this completes the Zelda: Tears of the Kingdom South Lomei Labyrinth objectives. Don't forget to tackle the Akkala Labyrinth and the Hebra Labyrinth while you're at it.
There are numerous mechanics and facets to learn in The Legend of Zelda: Tears of the Kingdom. For more information, you can visit our guides hub.
The products discussed here were independently chosen by our editors. GameSpot may get a share of the revenue if you buy anything featured on our site.
Got a news tip or want to contact us directly? Email news@gamespot.com
Join the conversation