Zelda: Tears Of The Kingdom - How To Beat The Final Boss
Bring down the final boss in The Legend of Zelda: Tears of the Kingdom.
The Legend of Zelda: Tears of the Kingdom final boss is someone that long-time fans should be familiar with. This time, an old rival has a few tricks up his sleeve. Here's our guide to help you beat the final boss in Zelda: Tears of the Kingdom. Naturally, this article contains major spoilers.
How to beat final boss Ganondorf in The Legend of Zelda: Tears of the Kingdom
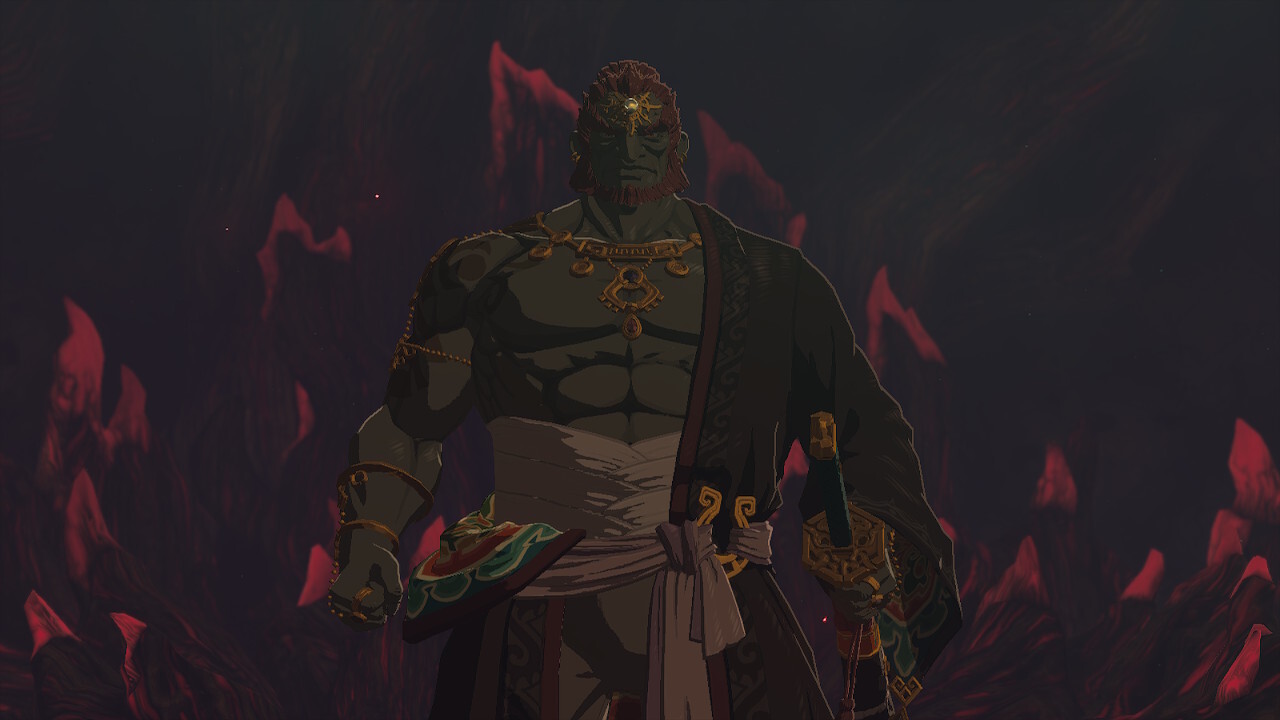
The Legend of Zelda: Tears of the Kingdom Ganondorf final boss is no longer the mummified version from the intro, nor is he the Phantom Specter that you saw in Hyrule Castle. This time, he's beefed up considerably, and he's going to test your mettle.
All of Ganondorf's attacks cause the Gloom affliction, so make sure you've got Sundelion-based meals to cleanse the debuff when necessary. Oh, and we have to mention, this is a boss battle with three and a half phases. If you want, you can take photos of each of his forms so they can be added to your compendium.
Note: We recommend placing a Travel Medallion in Hyrule Depths just before the Demon King's Army battle. Once you finish that, you'll be sent straight to Ganondorf's cavern, and it's no longer possible to save nor fast travel while you're there. As such, make sure you've got everything you need, such as the Master Sword. If you feel like you forgot some stuff, you'll have no choice but to load an earlier save and redo the Demon King's Army encounter.
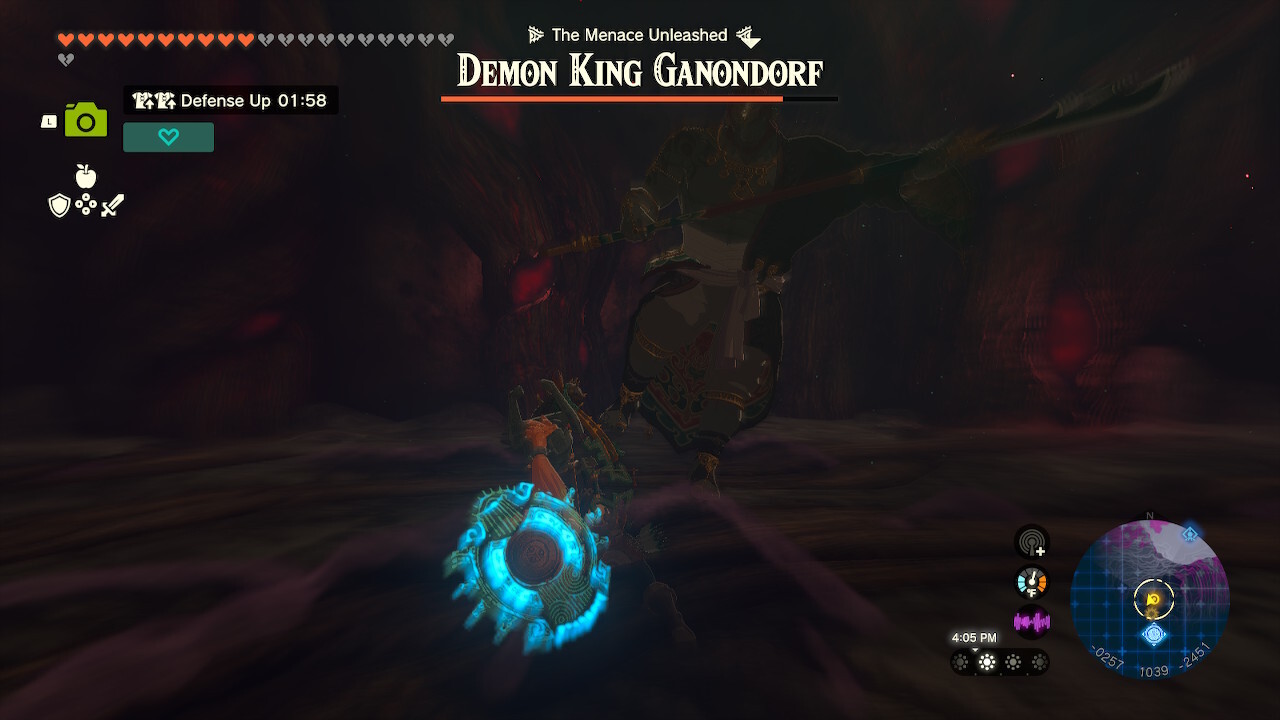
Demon King Ganondorf: Phase 1
Ganondorf has the following attacks, which will change based on the weapon that he's using:
- Sword Lunge - This is his normal attack, which alternates with most other abilities. It's also easily telegraphed, and you'll likely dodge this one to counter with Flurry Rush.
- Ground Blades - Causes three red-bladed projectiles to travel along the ground. Just move in between the gaps.
- Gloom Arrows - Fires three arrows in quick succession. Just move sideways.
- Spear Thrust - Does a wind-up before charging at you across the room. This is done thrice, so make sure to avoid each one.
- Super Slam - Jumps into the air before crashing down on the ground. Quickly get out of the way when this occurs.
Moreover, he will dodge every normal melee attack you do. You can only deal damage if you shoot him with arrows (minimal) or do a perfect dodge to follow up with a Flurry Rush (effective).
We recommend equipping weapon fuses with high attack ratings, or the Master Sword with a high-tier fuse material. A Mighty Zonaite Shield combined with another shield may also be viable for defense, in case you miss your chance to dodge.
Demon King Ganondorf: Phase 2A
After whittling down his HP, Ganondorf will switch to the second phase of the fight. This time, he'll summon the Phantom Ganon versions. The good news is that your Sage companions will distract most of them, so you'll probably deal with only one at a time (unless you unluckily aggro others). As usual, wait for the Sword Lunge, then dodge and Flurry Rush to counter.
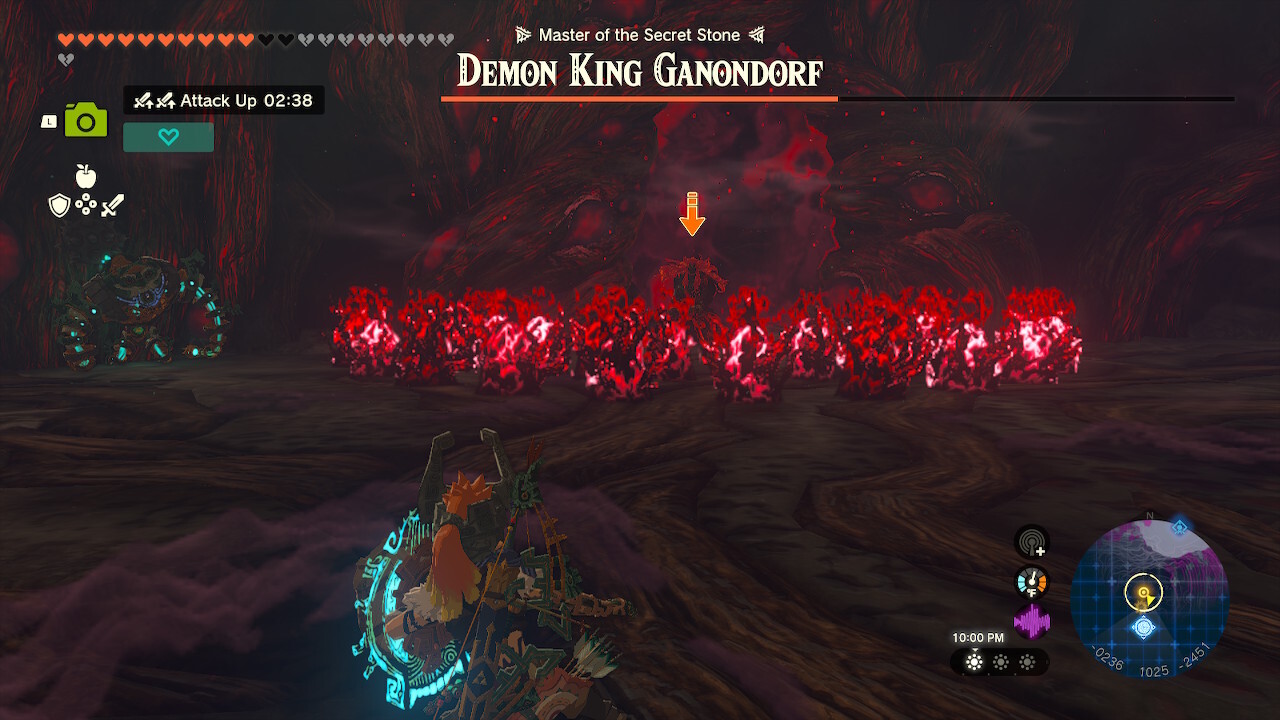
Demon King Ganondorf: Phase 2B
After all the Phantom Ganons are dead, it's time for the next portion of this phase. We feel that this is the toughest part of the Zelda: Tears of the Kingdom Ganondorf final boss encounter, as he either retains or boosts his abilities. Moreover, all your Sage companions will be stunned for the remainder of the battle.
- Seeker Arrows and Spear Thrust - Three projectiles will track you, so you'll want to run sideways. While this is happening, you also need to avoid the Spear Thrust move.
- Crimson Eruption - Multiple crimson flames will cascade from Ganondorf, covering a wide area.
- Crimson Closure - Instead of moving outward, the flames will move inward. This ability is a bit hard to avoid if you're on the ground. You can try boosting yourself into the air. Alternatively, switch to your shield to have better lateral control of Link, which should let you see the gaps as you move away. Just be careful since the boss might do the Sword Lunge as well.
There are also a few important things to take note of:
- The dodge -> Flurry Rush sequence won't work anymore. Ganondorf will dodge your counter and do a counter of his own. As such, it's imperative that you ready your block when this occurs.
- His attacks don't just cause the Gloom affliction, which you would've been able to cleanse with Sundelion. Instead, they'll automatically remove your max hearts. Technically, you can't heal this time.
- At best, you'll have an opening during the Crimson Eruption and Seeker Arrow casting animations. For a few seconds, you'll be able to pop him in the head with arrows.
- You can try to launch yourself into the air (i.e. shield + Spring/Time Bomb combo), then aim to slow down time.
Demon King Ganondorf: Phase 3
After depleting Ganondorf's HP, another cutscene will play. He'll eat his Secret Stone and transform into a Demon Dragon. Despite his ominous nature, this is probably the easiest phase of the Zelda: Tears of the Kingdom final boss encounter.
Here's what happens:
- The Light Dragon (i.e. Dragon Zelda) will swoop in to save Link. You can then ride the Light Dragon as the two face off in the sky in an epic battle.
- Jump off the Light Dragon and skydive to the Demon Dragon's body. You should see a glowing scale/spike. Hit that, and you'll be thrown back to Zelda. You'll just repeat the process by striking another scale.
- The Demon Dragon does have abilities, like a Crimson Rain of Fire and Crimson Fireballs, but they're fairly easy to avoid. You also get afflicted with Gloom while you're close to him. But, as soon as you move away or reach Zelda, the Gloom-affected hearts will be cleansed (you're in an open area anyway).
- The Light Dragon will automatically fly to a position to catch you in case you're falling.
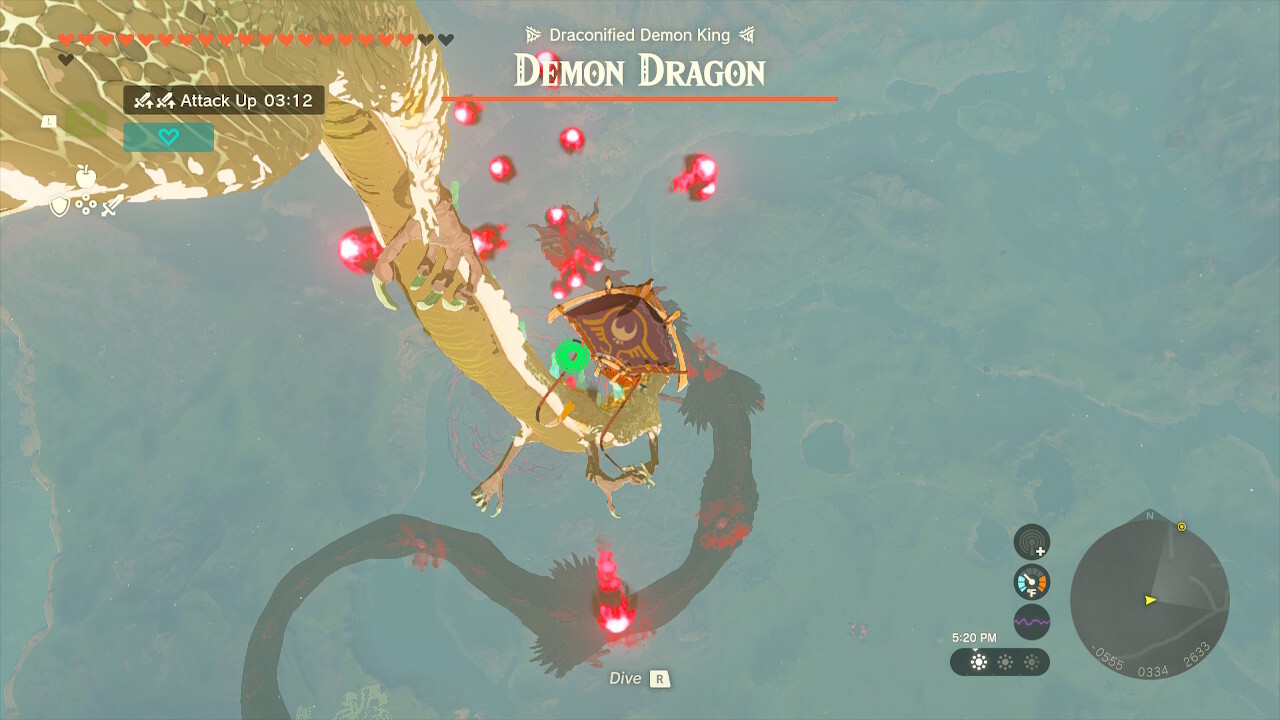
At the very end, the Demon Dragon's Secret Stone on its forehead will glow. Dive to it, then destroy it with the Master Sword. This will annihilate your foe. And that's it, you've beaten the Zelda: Tears of the Kingdom Ganondorf final boss encounter. The campaign has been concluded, but you might want to check out if you got the true ending.
There are numerous mechanics and facets to learn in The Legend of Zelda: Tears of the Kingdom. For more information, you can visit our guides hub.
The products discussed here were independently chosen by our editors. GameSpot may get a share of the revenue if you buy anything featured on our site.
Got a news tip or want to contact us directly? Email news@gamespot.com
Join the conversation